
An attempt to establish a Remote Desktop connection to a remote computer using the built-in Windows RDP client (mstsc.exe) may fail with an error.

This computer can’t connect to the remote computer.
Try connecting again. If the problem continues, contact the owner of the remote computer or your network administrator.

An RDP connection to a remote computer on Windows can fail for many reasons. Our guide explains how to troubleshoot the This computer can’t connect to the remote computer error when connecting from supported Windows 11 clients (including versions 24H2 and 25H2), to Windows PCs and Remote Desktop Services (RDS) hosts running supported Windows Server versions (including Windows Server 2022 and Windows Server 2025).
Troubleshooting steps may differ depending on whether you use a direct RDP connection, Remote Desktop Gateway, or an RDS deployment.
First of all, the troubleshooting steps depend on the client you use. The built-in Remote Desktop Connection client (mstsc.exe) remains supported for direct RDP connections to remote PCs and on-premises Remote Desktop Services (RDS) deployments.
The legacy Remote Desktop app from the Microsoft Store reached end of support on May 27, 2025. Windows App replaces the legacy app for supported cloud services (including Azure Virtual Desktop and Windows 365). As of October 2026, Windows App for Windows supports direct connections to remote PCs as a generally available (GA) feature. You can use the app in order to connect to a remote PC by entering its computer name/IP address.
The classic Remote Desktop Connection client (mstsc.exe) remains available for direct RDP connections and supported Remote Desktop Services (RDS) cases. You need to choose the client based on the required features, authentication method, Remote Desktop Gateway config, and your organization’s management requirements (see Microsoft’s Windows App release notes for current capabilities and limitations).
Security warnings for RDP files. Starting with the April 2026 security updates, Remote Desktop Connection displays new security warnings when you open .rdp files. So, you need to review the remote machine address and the requested resource redirections before connecting. Clipboard, drive, and other redirections are disabled by default unless you explicitly enable them. Do not open unexpected .rdp files, and verify the publisher before trusting a signed file. These changes affect connections launched from .rdp files, not connections started by manually entering a computer name in mstsc.exe.
For Windows Server 2025 RDS deployments, you need to verify that the RD Session Host, RD Licensing server, and installed RDS Client Access Licenses (CALs) are compatible. Windows Server 2025 Session Hosts require Windows Server 2025 RDS CALs; earlier CAL versions cannot license connections to a Windows Server 2025 Session Host.
Before troubleshooting RDP connectivity, you need to check if the client and server are running supported, appropriately serviced Windows versions. ESU provides eligible devices with security updates but does not restore full product support.
Quick Fixes for RDP Connection Errors
Start with the simplest solutions:
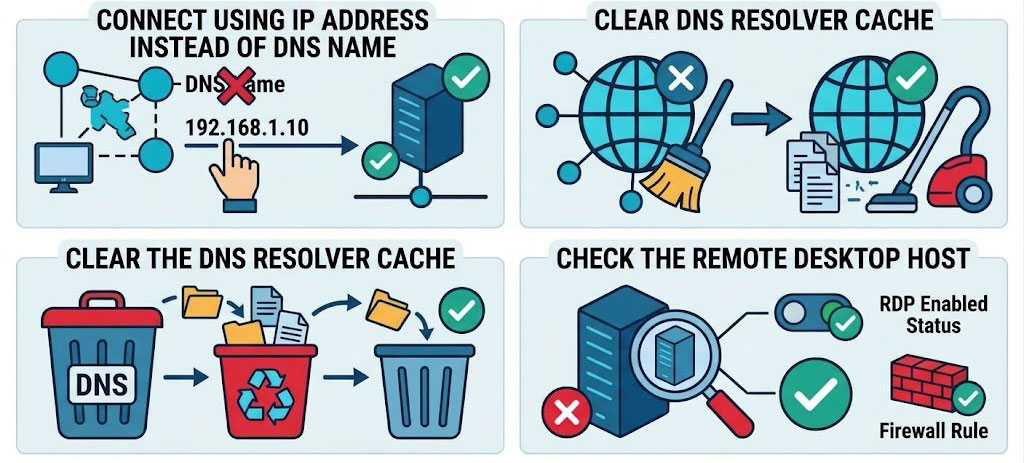
| Solution | Details |
|---|---|
| Connect Using IP Address Instead of DNS Name | Try to establish a connection to the remote computer by using an IP address instead of a DNS name. |
| Clear DNS Resolver Cache | Clear the DNS resolver cache on the client using the command: ipconfig /flushdns |
| Check the Remote Desktop Host | Verify that the remote host is reachable and that Remote Desktop Services is running. Follow the detailed host and listener checks below before considering a restart. |
Common Causes of RDP Errors
If these steps don’t help, check the following causes that may prevent you from connecting to the remote computer over RDP.
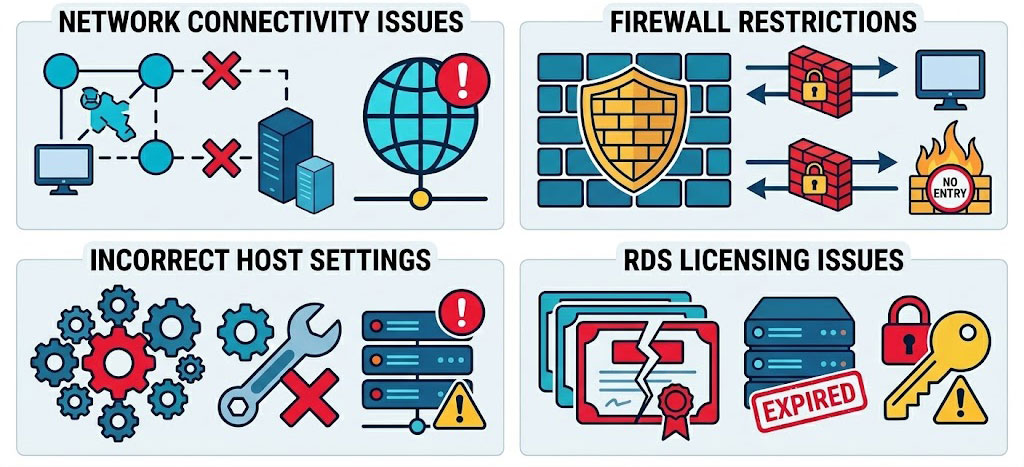
- Network connectivity issues;
- Firewall restrictions;
- Incorrect settings on the RD host;
- RDS licensing issues (grace period expired/license server unavailable)
Checking Network Connectivity to Remote Desktop Host
Test RDP Port Using PowerShell
Check that you are able to access the remote computer over the network and that the RDP port (TCP 3389) is responding. Check connectivity to the RDP host using PowerShell:
Test-NetConnection rdp-server-01 -Port 3389
Don’t forget to replace rdp-server-01 with the actual DNS name or IP address of the remote machine.
If the connection fails in Windows App but works in mstsc.exe, or vice versa, you need to check if the app supports your connection scenario before troubleshooting the RDP host. Windows App and Remote Desktop Connection do not support exactly the same set of connection types. For cloud desktops, you need to check the Windows App connection status and service-specific requirements; for direct RDP connections, verify the target host, port, firewall, and authentication settings.

To check if a suitable network tracing scenario is available on the system, run the following command from an elevated Command Prompt:
netsh trace show scenarios
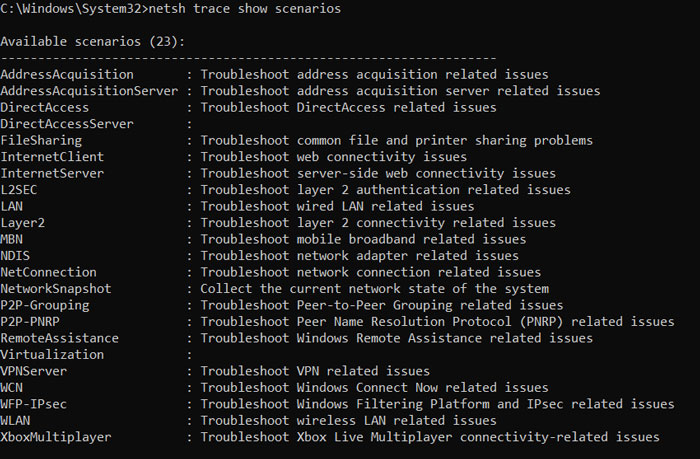
Available tracing scenarios vary by Windows version
If no suitable scenario is available, you need to capture network traffic with Pktmon/Wireshark, or use a general network trace:
netsh trace start capture=yes tracefile=C:\Temp\rdp.etl
Reproduce the connection problem, then stop the trace with command below:
netsh trace stop
Alternatively, you can inspect the Microsoft-Windows-RemoteDesktopServices-RdpCoreTS/Operational event log on the relevant Windows host. Event ID 131 can provide info about the RDP transport selected for a connection, including TCP or UDP, depending on the event details and Windows version.
Remember that Test-NetConnection tests TCP connectivity only. If TcpTestSucceeded is False, you need to check DNS resolution, routing, firewall rules, and whether the target host is listening on the specified TCP port. Note that a successful TCP test does not confirm that RDP authentication or session establishment will succeed.
Check every firewall and network control along the connection path: Windows Firewall on the host, network firewalls, third-party security software, VPN, and RD Gateway (TCP 443), if used. In domain environments, verify the effective Group Policy, since local settings may be overridden.
RDP can use UDP 3389 as an additional transport alongside TCP 3389 for direct connections to a Windows Remote Desktop host, provided that UDP transport is supported and permitted by the client, server, and network config. This standard RDP transport is different from RDP Shortpath, which is used in Azure Virtual Desktop (AVD) and Windows 365 deployments.
UDP availability and behavior can vary with RD Gateway, network policies, and the connection path. You should not assume that blocked UDP is the cause of a connection failure without checking client/server logs and network traces.
Note that RDP traffic may also be tunneled over HTTPS (TCP 443) when using RD Gateway. In case it’s your scenario, note that port 3389 is not directly exposed to the client.
If you use a third-party firewall or antivirus, make sure it does not block incoming RDP connections.
Validating Remote Host Configuration
Check the Remote Desktop configuration on the remote host:
Enable RDP on the Remote Host
Make sure that RDP is enabled on the remote host. You can remotely enable RDP on a Windows computer by editing the registry.
Check If Remote Desktop Connections Are Allowed
Windows stores the Remote Desktop connection setting in the fDenyTSConnections registry value. A value of 0 allows incoming Remote Desktop connections, while 1 denies them.
Run the following PowerShell command on the remote machine you want to connect to:
Get-ItemPropertyValue `
-Path 'HKLM:\SYSTEM\CurrentControlSet\Control\Terminal Server' `
-Name fDenyTSConnections
In case the command returns 0, incoming Remote Desktop connections are allowed by this registry setting. If it returns 1, Remote Desktop connections are disabled by this setting.
In order to enable Remote Desktop, you should use the supported Windows setting/run the following command in an elevated PowerShell session on the remote machine:
Set-ItemProperty `
-Path 'HKLM:\SYSTEM\CurrentControlSet\Control\Terminal Server' `
-Name fDenyTSConnections `
-Value 0
After enabling Remote Desktop, verify the firewall rules (see “Verify Firewall Rules for Active Network Profile” below).
Check Required Windows Services
On the remote machine, you need to check if the Remote Desktop Services (TermService) service is running. This service is required to accept incoming RDP connections.
You can check its status in PowerShell:
Get-Service -Name TermService
The UmRdpService service supports Remote Desktop device and resource redirection. You need to check it when troubleshooting problems with redirected devices/resources, rather than treating it as a general requirement for establishing an RDP connection.
You do not normally need to check these services on the client machine when troubleshooting an outgoing RDP connection. In case the client cannot connect, you need to also verify network connectivity, the destination address, firewall rules, and whether the remote machine is configured to accept Remote Desktop connections.
Diagnosing RDS Licensing Problems
In Remote Desktop Services (RDS) deployments, new connections may fail if the licensing grace period has expired or the RD Session Host cannot contact a compatible RD Licensing server. If you are troubleshooting an RDS environment, check the following:
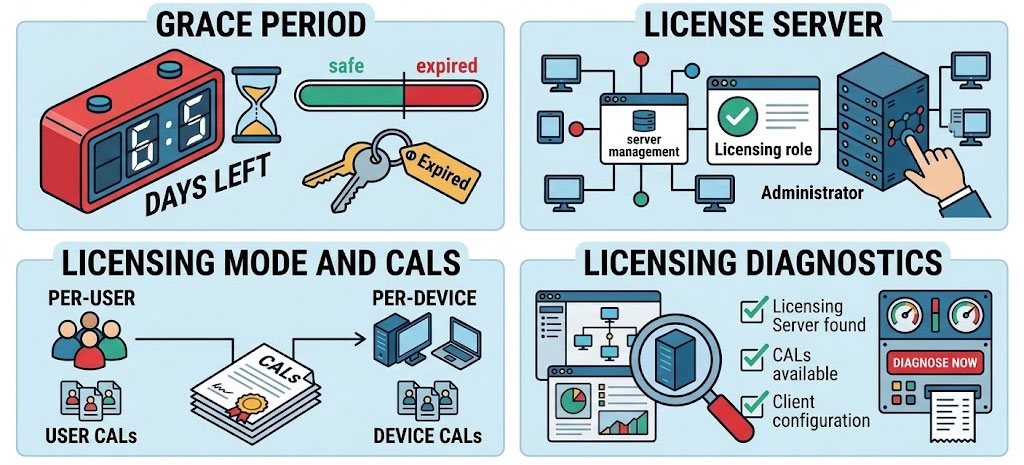
- Grace period: You need to check if the RDS licensing grace period has expired.
- License server: Confirm that the RD Licensing server is activated, reachable, and configured for the deployment.
- Licensing mode and CALs: You need to verify that the configured Per User or Per Device licensing mode matches your deployment and that compatible RDS CALs are installed.
- Licensing diagnostics: Run RD Licensing Diagnoser (lsdiag.msc) on the RD Session Host and review any reported licensing errors.
For Windows Server 2025 deployments, you should check if the installed RDS CAL version is compatible with the Session Host. Earlier RDS CAL versions cannot license a Windows Server 2025 Session Host.
You can also review the relevant TerminalServices-Licensing and TerminalServices-RemoteConnectionManager event logs for additional details.
In case licensing checks do not reveal a problem, you should continue troubleshooting network connectivity, the RDP listener, firewall rules, authentication, and Remote Desktop Gateway settings, as applicable.
Verify RDP Port and Firewall Settings
Check that Remote Desktop Services is listening on the default TCP port 3389 and that the default RDP port has not been changed. To check the configured RDP port remotely, you can use Invoke-Command if PowerShell Remoting is enabled and WinRM is reachable and authorized. If WinRM is unavailable, run the registry check locally on the remote host or use an approved alternative management channel.
Invoke-Command -ComputerName computername1 {Get-ItemProperty -Path "HKLM:\SYSTEM\CurrentControlSet\Control\Terminal Server\WinStations\RDP-Tcp" -Name PortNumber | Select-Object PortNumber} If you have console access to the remote machine, run the following command locally in an elevated PowerShell session. This does not require WinRM:
Get-ItemProperty `
-Path 'HKLM:\SYSTEM\CurrentControlSet\Control\Terminal Server\WinStations\RDP-Tcp' `
-Name PortNumber |
Select-Object PortNumber
The PortNumber registry value shows the configured RDP port; it does not confirm that the listener is active. In order to check if the target host is listening on the configured TCP port, run the following command locally on the host:
Get-NetTCPConnection -State Listen -LocalPort 3389 -ErrorAction SilentlyContinue
You need to replace 3389 with the configured port if it has been changed. To test reachability from the client, use Test-NetConnection as described in the network connectivity section. If no listener is returned, you need to investigate the RDP listener config and Remote Desktop Services before changing firewall rules.
If Get-NetTCPConnection is unavailable, you can use netstat.exe from Command Prompt:
netstat -ano | findstr ":3389"
If a non-standard port number is configured, specify the RD host address and port in the client as follows:
rdp-server-01:3395

Keep in mind that changing the RDP listening port does not automatically disable firewall rules that allow inbound connections on TCP 3389.
Before disabling any rules, you need to review the built-in Remote Desktop firewall rules and confirm that the default port is no longer required by other systems/management workflows. In enterprise environments, you can manage these changes through Group Policy/your organization’s centralized firewall management system where appropriate. Make sure not to disable any unrelated firewall rules.
Run the following command in an elevated PowerShell session in order to review the enabled state, profiles, direction, and action of the built-in Remote Desktop firewall rules:
Get-NetFirewallRule -Group '@FirewallAPI.dll,-28752' |
Select-Object DisplayName, Enabled, Profile, Direction, Action
Note that the command above does not identify the port associated with each rule.
In order to inspect the configured ports, run the following:
Get-NetFirewallRule -Group '@FirewallAPI.dll,-28752' |
Get-NetFirewallPortFilter |
Select-Object Protocol, LocalPort, RemotePort
Updating Windows Firewall Rules for the New RDP Port
If you change the default RDP listening port from TCP 3389, you must also ensure that Windows Firewall allows inbound connections to the new port. The built-in Remote Desktop firewall rules commonly allow TCP 3389, so changing the registry value alone may not be sufficient.
First, you need to config the new RDP listening port on the remote machine. Run the following commands in an elevated PowerShell session on the target machine. Replace 3395 with your chosen TCP port:
$newRdpPort = 3395

Set-ItemProperty `
-Path 'HKLM:\SYSTEM\CurrentControlSet\Control\Terminal Server\WinStations\RDP-Tcp' `
-Name PortNumber `
-Value $newRdpPort
Note that changing the registry value does not guarantee that the RDP listener is already using the new port. Apply the change according to your maintenance procedure, verify the listener, and confirm that a new RDP connection works before closing your existing admin session.
After changing the PortNumber registry value, you need to config an inbound firewall rule for the new TCP port. Run the following commands in an elevated PowerShell session on the remote machine, replacing 3395 with your chosen port:
$newRdpPort = 3395
$trustedRdpSources = @('10.20.30.0/24')

# Allow inbound RDP over TCP from approved sources
New-NetFirewallRule `
-DisplayName "Remote Desktop - Custom TCP Port $newRdpPort" `
-Direction Inbound `
-Protocol TCP `
-LocalPort $newRdpPort `
-RemoteAddress $trustedRdpSources `
-Action Allow `
-Profile Domain,Private

# Allow inbound RDP over UDP from approved sources, if required
New-NetFirewallRule `
-DisplayName "Remote Desktop - Custom UDP Port $newRdpPort" `
-Direction Inbound `
-Protocol UDP `
-LocalPort $newRdpPort `
-RemoteAddress $trustedRdpSources `
-Action Allow `
-Profile Domain,Private
You should use only the firewall profiles required by your environment:
- The TCP rule is required for the standard RDP connection
- The UDP rule allows the additional UDP transport when supported and negotiated by the client and host
See the UDP transport discussion earlier in the article.
Make sure the new port is also permitted on network firewalls and VPN rules along the path.
Restart the Remote Desktop Services host/reboot it during an approved maintenance window if required for the port change to take effect. Before disconnecting your existing session, you need to check if the new port is listening and that you can establish a new RDP connection using hostname:port, for example server01:3395.
Security note. Keep in mind that changing the RDP port is not a substitute for Network Level Authentication (NLA), strong authentication, or restricting access to trusted networks.
Verify Firewall Rules for Active Network Profile
Now check your network connection profile. Note that on Public network profiles, Windows Firewall may block inbound RDP connections unless the Remote Desktop firewall rule is enabled for Public networks.

Check if the built-in Remote Desktop firewall rules are enabled and apply to the active network profile. Note that enabling firewall rules does not change the network profile from Public to Private.
To enable the built-in Remote Desktop firewall rules, run the following command in an elevated PowerShell session:
Enable-NetFirewallRule -Group '@FirewallAPI.dll,-28752'
If you specifically need to change the network profile for troubleshooting, first you need to identify the relevant network interface and its current profile:
Get-NetConnectionProfile
If you need to change the profile of a specific network interface to Private, use its interface index:
Set-NetConnectionProfile -InterfaceIndex 12 -NetworkCategory Private
You need to replace 12 with the actual InterfaceIndex returned by Get-NetConnectionProfile. Only change the profile when appropriate for the network and your organization’s security policy.
If the Remote Desktop firewall rules do not apply to the active network profile, you need to inspect their configured profiles before changing them.
Verify the current config as described below. In case an approved config requires a specific Remote Desktop firewall rule to apply to the Public profile, you can update that rule with Set-NetFirewallRule. Identify the intended rule first and avoid changing every rule in the group indiscriminately.

Troubleshooting RDP Security and Authentication Issues
RDP connection failures may be caused by TLS negotiation, certificate validation, Network Level Authentication (NLA), or CredSSP compatibility issues. Windows 7 and Windows 8.1 are no longer supported, so upgrade these clients to a supported operating system rather than weakening RDP security settings on production servers.
In modern Windows environments, NLA uses CredSSP to authenticate users before establishing a full RDP session. Direct RDP connections use TCP 3389 by default, although the port can be changed. TLS negotiation and authentication behavior depend on the client, server, and effective security policies.
You need to check that both the client and the remote host have the latest applicable security updates installed. Review the effective Group Policy settings for Remote Desktop security, Network Level Authentication (NLA), and CredSSP, then examine the relevant Remote Desktop Services event logs to identify the cause of the connection failure.
Troubleshooting CredSSP and Authentication Compatibility Issues
A Remote Desktop connection may fail in case the RDP client and remote machine have incompatible CredSSP security updates/Encryption Oracle Remediation policy settings. This issue is associated with CVE-2018-0886. For example, an updated client may refuse to connect to a server that has not received the required CredSSP updates.
Recommended fix
You need to install the latest applicable Windows security updates on both the client and the Remote Desktop Session Host, then restart the affected systems as required. Verify the effective Encryption Oracle Remediation policy on both machines if the problem persists.
In order to check the policy, open the Local Group Policy Editor (gpedit.msc) and go to Computer Configuration > Administrative Templates > System > Credentials Delegation > Encryption Oracle Remediation. Here you need to review the policy state and protection level, including any settings applied through domain Group Policy. Note that you should not change the protection level to Vulnerable as a routine troubleshooting step: this permits insecure CredSSP compatibility and can expose the remote system to attacks. If a formally approved temporary exception is unavoidable, you should restore the secure setting immediately after testing.
Legacy RemoteApp deployments. Windows Server 2012 and Windows Server 2012 R2 are no longer covered by the Extended Security Updates (ESU) program, which ended on October 13, 2026. You need to migrate these deployments to a supported Windows Server version rather than relying on legacy transport/authentication workarounds.
Resolving RDP Gateway Connection Issues
There is another bug related to Remote Desktop Gateway which is used to deliver RemoteApps to users:
RemoteApp Disconnected.
Your computer can’t connect to the remote computer because the Remote Desktop Gateway server address is unreachable or incorrect. Type a valid Remote Desktop Gateway server address.

This error can also look like this:
Your computer can’t connect to the remote computer because the Remote Desktop Gateway server is temporarily unavailable. Try reconnecting later or contact your network administrator for assistance.
If you are facing one of the errors above, then one possible cause of the problem is that your computer can’t resolve the public FQDN name of your Remote Desktop Gateway server. In most cases in real life, the public name of the RDGW doesn’t match the hostname.
Fixing the problem
-
- Open the Internet Information Services (IIS) Manager (Inetmgr.exe) console on the RD Gateway host;
- Go to the Sites > Default Web Site > RDWeb > Pages > Application Settings;
- In the DefaultTSGateway field, enter the server’s FQDN public name of your RD Gateway server, and then restart the web services with the command:
iisreset
Warning. iisreset command restarts IIS services across the server and may interrupt active RD Web Access sessions and other websites hosted on the same IIS instance. If only RD Web Access needs to be restarted, you need to identify the relevant IIS application pool and restart that pool instead. Follow the steps below:
First, identify the RD Web Access application pool name before restarting it:
Import-Module WebAdministration
Get-ChildItem IIS:\AppPools | Select-Object Name, State
Then restart the confirmed pool:
Restart-WebAppPool -Name 'APP_POOL_NAME'
Keep in mind that restarting the pool may interrupt active RD Web Access requests.
- Also, check your RDGW certificate. You can find your SSL certificate info by going to Server Manager > Remote Desktop Services > Collections > Your_Collection > Tasks > Edit Deployment Properties > Certificates > RD Gateway > View Details. Here check the certificate expiration date.

- Go back to your client’s machine, and try to start a new RDP session.
Other RDP Error Codes and Solutions
This section lists other common RDP connection errors that can cause the “This computer can’t connect to the remote computer” error.
Error 0x904 – Network or VPN Issues

Error Code: 0x904, Extended Error Code: 0x7 – this error usually indicates transport-level connectivity problems, VPN instability, packet loss, or interrupted secure channel negotiation.
To troubleshoot this error, you need to check network connectivity, the RDP listener, and Remote Desktop Gateway configuration if your connection uses a gateway.
1. Verify network connectivity
Refer to the network connectivity diagnostics earlier in our guide. For 0x904, pay special attention to VPN stability and packet loss.
2. Verify that the RDP listener is running
Check the RDP listener using the procedure described in the Verify RDP Port and Firewall Settings section. If the listener is active, continue investigating network reachability, VPN stability, authentication.
3. If you connect through RD Gateway
You need to check if the client uses the correct gateway hostname and that the gateway’s certificate is valid and trusted. Check gateway availability and the relevant Remote Desktop Gateway operational logs on the gateway server. Also, you need to verify that the client can reach the gateway over the configured transport, commonly TCP 443.
Record the exact error text and check the client and server event logs at the time of the failed connection before changing security settings.
Error 0x108 – RDS Host Timeout

The two computers couldn’t connect in the amount of time allotted, Error code: 0x108 Extended error code: 0x0 This error indicates that the RDP connection could not be established within the allotted time.
If TCP connectivity succeeds but Error 0x108 persists, review network traces and Remote Desktop Services event logs. If the evidence suggests a UDP transport issue, you need to temporarily disable UDP on the RDP client as described below and check if the connection becomes stable.
On the RDS host, you need to check CPU and memory utilization, active sessions, session limits, and relevant system and Remote Desktop Services events.
As a troubleshooting step, you can temporarily disable UDP on the RDP client and check if the connection becomes stable. Note that this setting affects outgoing RDP connections initiated from that client; it does not disable UDP for all clients connecting to the RD Session Host.
reg add "HKLM\SOFTWARE\Policies\Microsoft\Windows NT\Terminal Services\Client" /v fClientDisableUDP /t REG_DWORD /d 1 /f
After testing, re-enable UDP transport by removing the temporary fClientDisableUDP registry value from the RDP client. Run the following command in an elevated Command Prompt:
reg delete "HKLM\SOFTWARE\Policies\Microsoft\Windows NT\Terminal Services\Client" /v fClientDisableUDP /f

Alternatively, configure the policy on the RDP client using Group Policy. Go to Computer Configuration > Administrative Templates > Windows Components > Remote Desktop Services > Remote Desktop Connection Client. Here you need to change Turn Off UDP On Client policy to Enabled.
Error 0xc07 – User Account Restrictions

Error code: 0xc07 – User Account Restriction is preventing you from logging on. This error may occur when you try to connect to a Windows machine using a local account that has a blank password. By default, Windows restricts remote network logons for local accounts with blank passwords through the security policy Accounts: Limit local account use of blank passwords to console logon only.
If the account you are using to connect to the remote computer has a blank password, you need to set a strong password and try connecting again. Windows security policies commonly prevent remote interactive sign-ins with local accounts that have blank passwords.
To set a password for a local account, you need to open an elevated Command Prompt on the remote computer and run:
net user username *
Don’t forget to replace username with the actual local account name. Enter and confirm the new password when prompted. Alternatively, you can set the password through Computer Management → Local Users and Groups → Users.
If the account already has a password, you need to check if the Accounts: Limit local account use of blank passwords to console logon only security policy is enabled. This policy is located under Computer Configuration\Windows Settings\Security Settings\Local Policies\Security Options.
For domain-managed computers, you should review the applicable Group Policy rather than changing the local setting alone.
Note that you should not disable this security policy to work around the error. Setting a strong password is the recommended fix. If the error persists, you need to verify the account name, account status, and permission to sign in through Remote Desktop Services.
RDP Cannot Find the Remote Computer
Remote Desktop can’t find the computer“computer_name”. This might mean that ” computer_name ” does not belong to the specified network – means that your computer cannot resolve the target host name.
This error occurs when the client cannot resolve the remote computer name through DNS. To fix it follow the steps:
- Check DNS resolution:
nslookup computer_name
If DNS resolution works incorrectly, you can specify the DNS server manually to verify whether the issue is related to the configured DNS servers on the client:
nslookup computer_name dns_server_ip

# Example below
nslookup rdpserver01 10.0.0.10 - Flush DNS cache:
ipconfig /flushdns
- Try connecting by IP address instead:
mstsc /v:192.168.1.100
In case the machine is in a domain, you need to verify if the DNS suffix is configured correctly on the client.




hello,
there are some fix:
“There are no available computers in the pool ”
Any suggestions? thanks
Make sure your computer’s IP is not the same as the remote PC.
In this case, your PC may resolve itself & got error.
ipconfig /flushdns
Reboot both PCs and check . Some times rebooting of PCs will solve many unknown crazy windows issues..
If you are connecting via VPN, the issue mostly relies on the above 1st method.
Your PC still cache the local IP which may same as the remote PC’s local ip.
I am searching on google how to solve RDP connection error problem and I find your post, hopefully, it will work. Thanks in advance!
Hello,
Thanks, editing the policies solve my problem.
Best regards
I have another issue.
Error Message I am getting is – “your computer can’t connect to the remote desktop gateway server”
Other users are able to connect to the same RDG server. Able to ping/telnet to the RDG.
The issues is being faced only for 1-2 users and not others. Any handles on this?
First, I really appreciate this article that you’ve published. I’ve been struggling with my RDP connections for awhile now and this was, by far, the most informative article I’ve encountered yet. I have 2 networks in different states and need the ability to connect to each from the other. After working thru all the suggestions in your articles, my RDP connection (using Gateway server) from Network 1 (New Jersey) to Network 2 (Florida) works fine. That is, from NJ I can connect remotely to my network in Florida. However, from Florida, attempting to connect to NJ, I still receive this message:
Your computer can’t connect to the remote computer because the Remote Desktop Gateway server address is unreachable or incorrect. Type a valid Remote Desktop Gateway server address.
I’ve made changes to both networks based on your article, but something is still missing in the one scenario. If you have any other suggestions, please let me know?
Same for me!
I did EVERYTHING and nothing else seems to work.
Changing the Security layer solved the problem.